

Web-Based SPARC’d: Upload Images
IMPORTANT!
Credentials: Before you begin, please contact Liz (520.743.2488 or lizt@arizona.edu) or Jane (520.909.9373 or jhunterhmc@gmail.com) to obtain your SPARC’d login credentials.
Image Folders: It is important to follow a standard protocol for storing and naming your images folders. If you need to learn more, please complete the Web-Based SPARC’d (Beta Version) training before proceeding.
Background: SPARC’d is an application developed at the University of Arizona to help researchers effectively manage their image data. SPARC’d currently operates on the Java platform. In 2026, efforts began to transition SPARC’d to a web-based application for enhanced accessibility. This page provides instructions for uploading images using the beta version of the web-based application.
Step 1: Go to the SPARC’d website
Open a browser on your computer (Chrome, Edge, Safari, Firefox, etc.).
Click this link: https://sparcd.arizona.edu/ or type the url in the address bar to access the SPARC’d website.
Step 2: Enter your Credentials and Login
On the Login page (see below), enter the following credentials:
Database URL: https://wildcats.sparcd.arizona.edu
Username: Contact Liz or Jane (usually your first initial followed by your last name)
Password: Contact Liz or Jane (usually three words with spaces in-between)
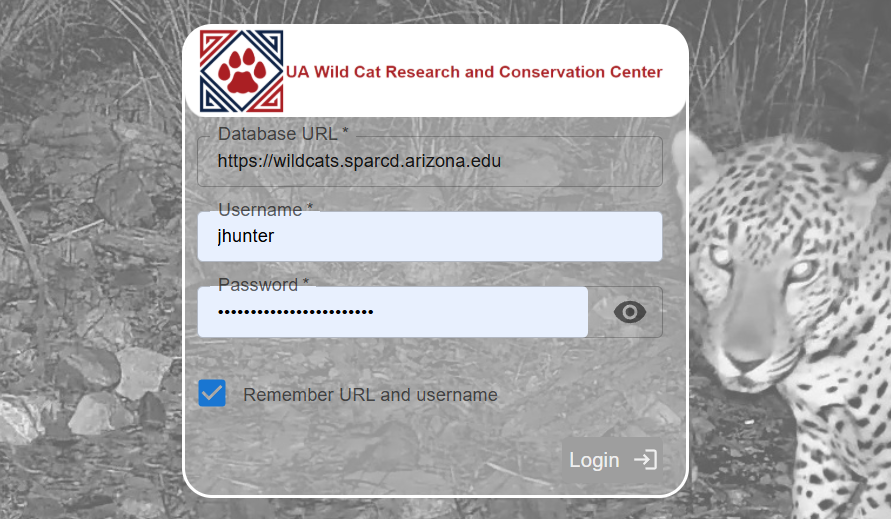
Click Login.
Note: Although your computer will usually autofill the Database URL, Username and Password for future sessions, save them in a secure location.
Step 3: Select Upload Images and Navigate to Images Folder
On your dashboard (see below), click Upload Images.
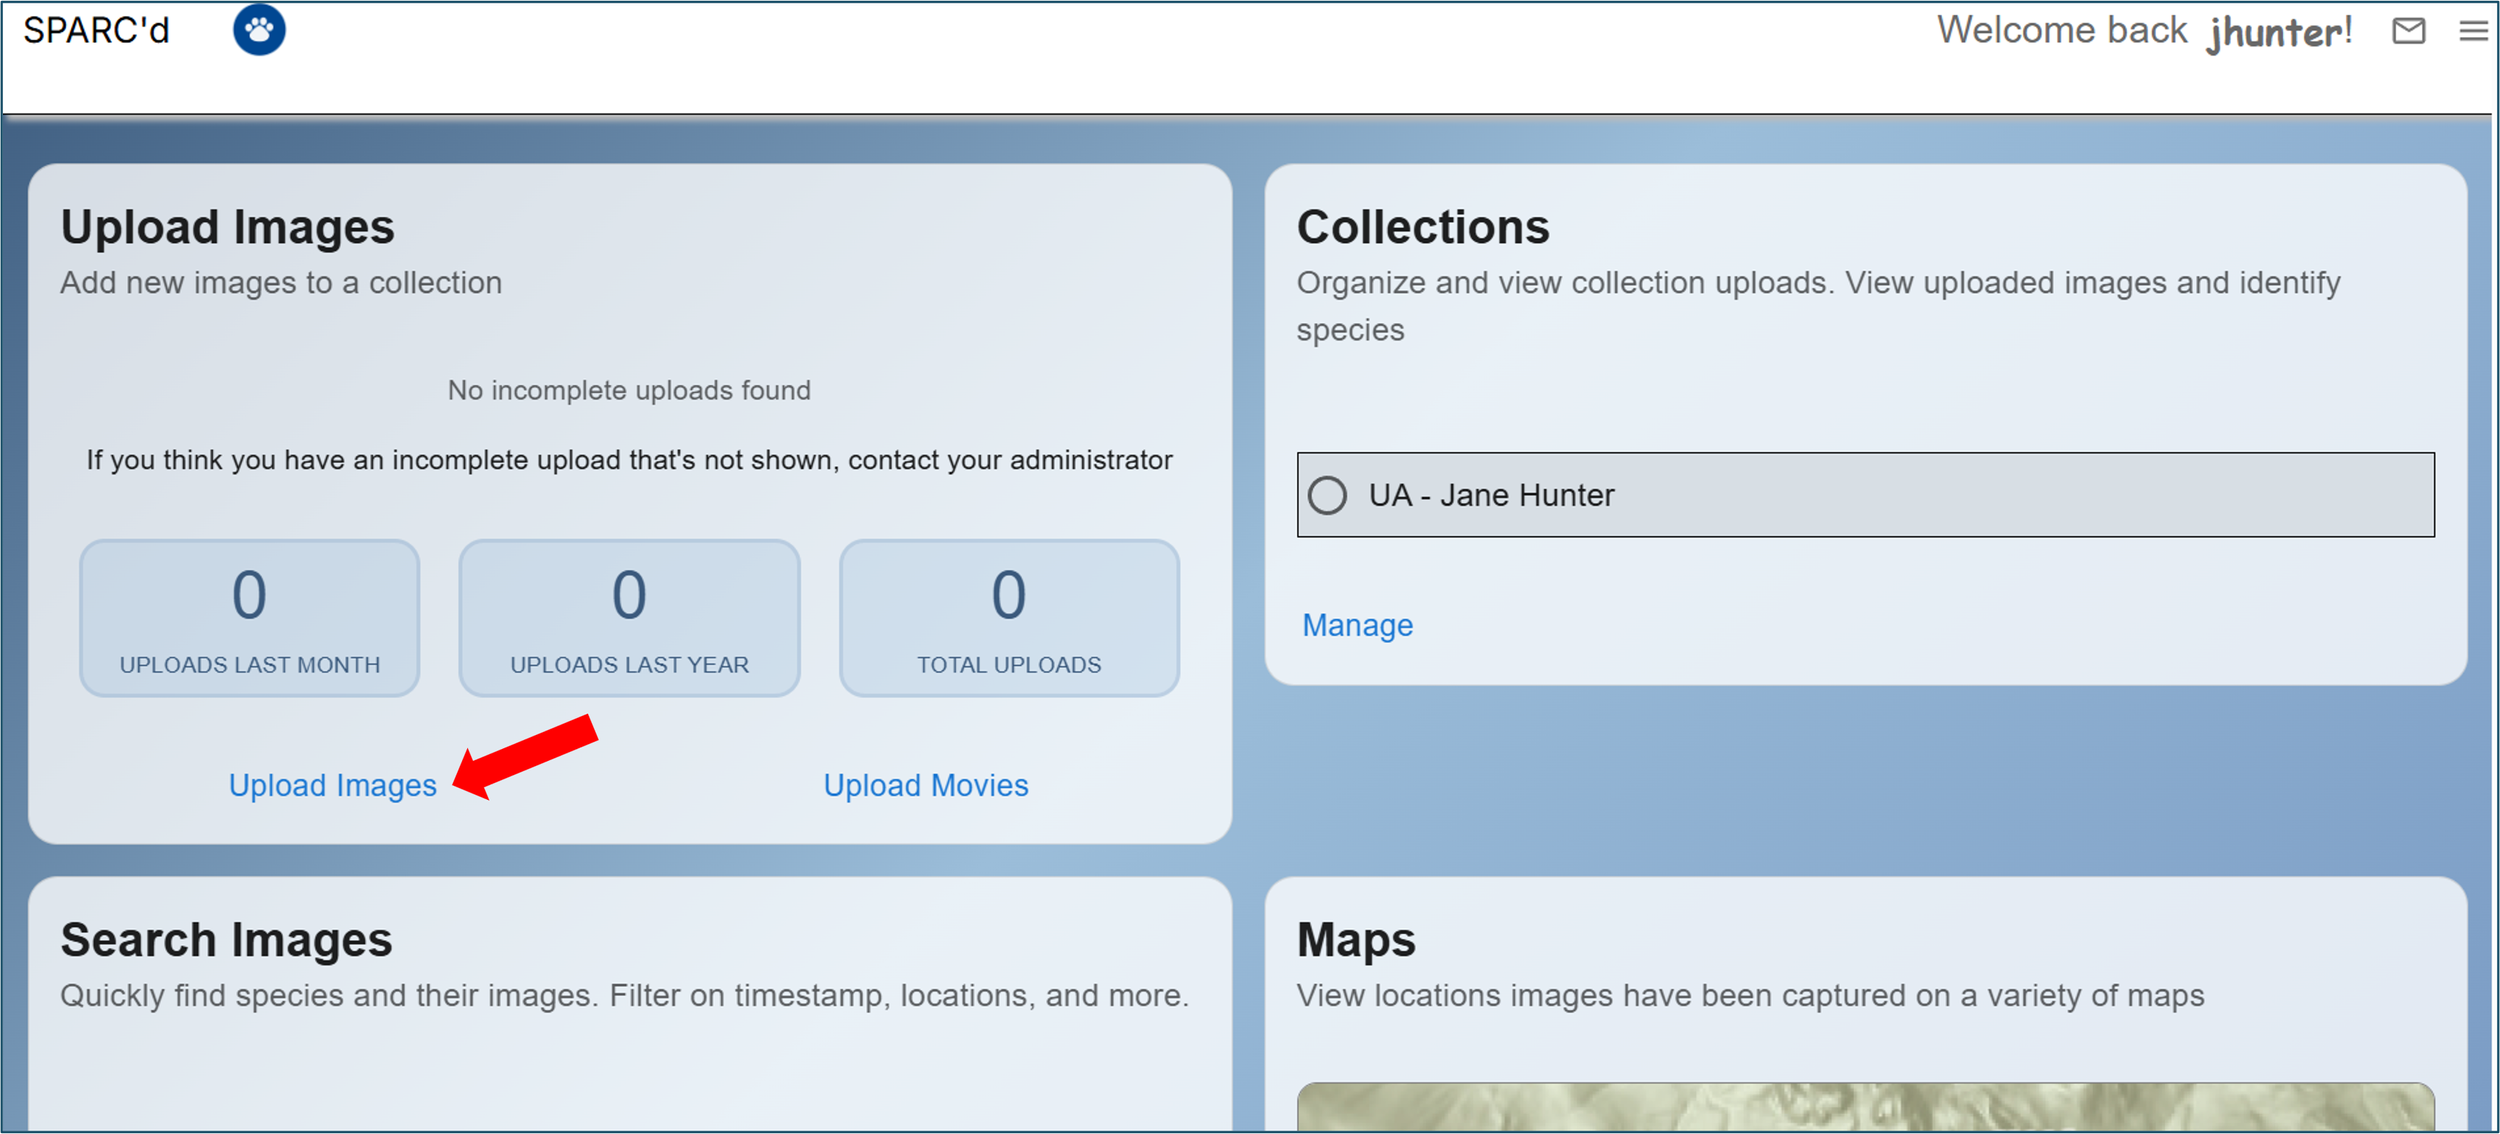
On the next screen, click Select Folder (see below).
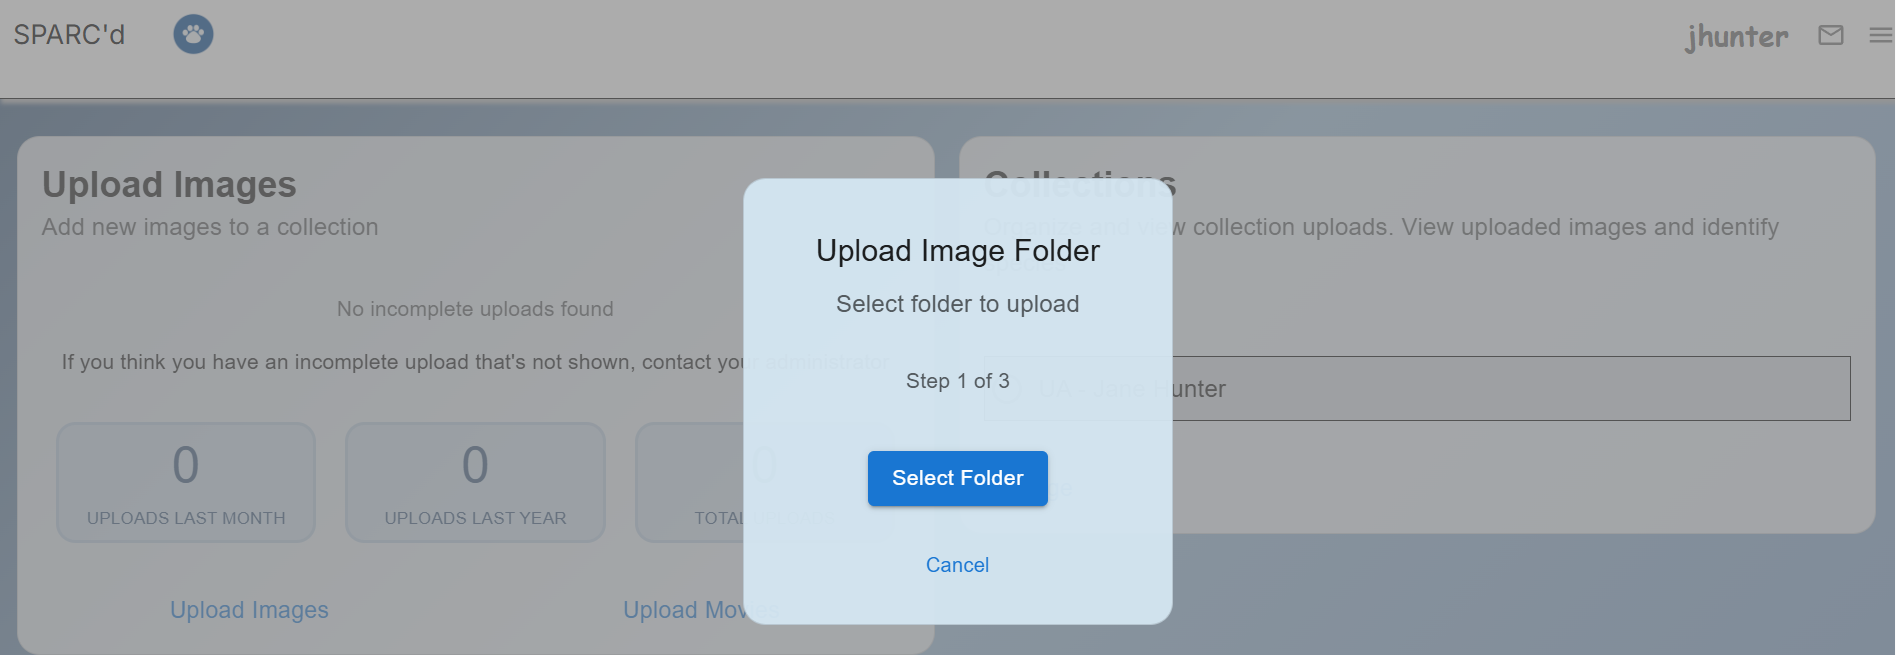
Navigate to the folder that contains your images. Assuming you followed the protocol for storing and naming your folders, the folder with images should be stored on your auxiliary storage device and should be named according to the standard naming convention (SITEID_MM.DD.YY_###.images).
Need Training? If you need to learn more about the protocol for storing and naming your images folders, complete the Web-Based SPARC’d (Beta Version) training.
Step 4: Enter New Upload Details
On the New Upload Details page (see below), enter the requested information:
Collection: Select your collection from the dropdown list. In most cases, only one option will be available.
Location: Select your camera location from the dropdown list.
Comment: Enter your comment following the exact format shown.
Mountain Range - Site Name - No. of images collected - Date Uploaded - Date collected
(e.g. Santa Rita Mountains - SAN06 - 39 images - uploaded 04-10-2020 - collected 03-28-2020)
TIme zone of Images: Select the time zone from the dropdown list.
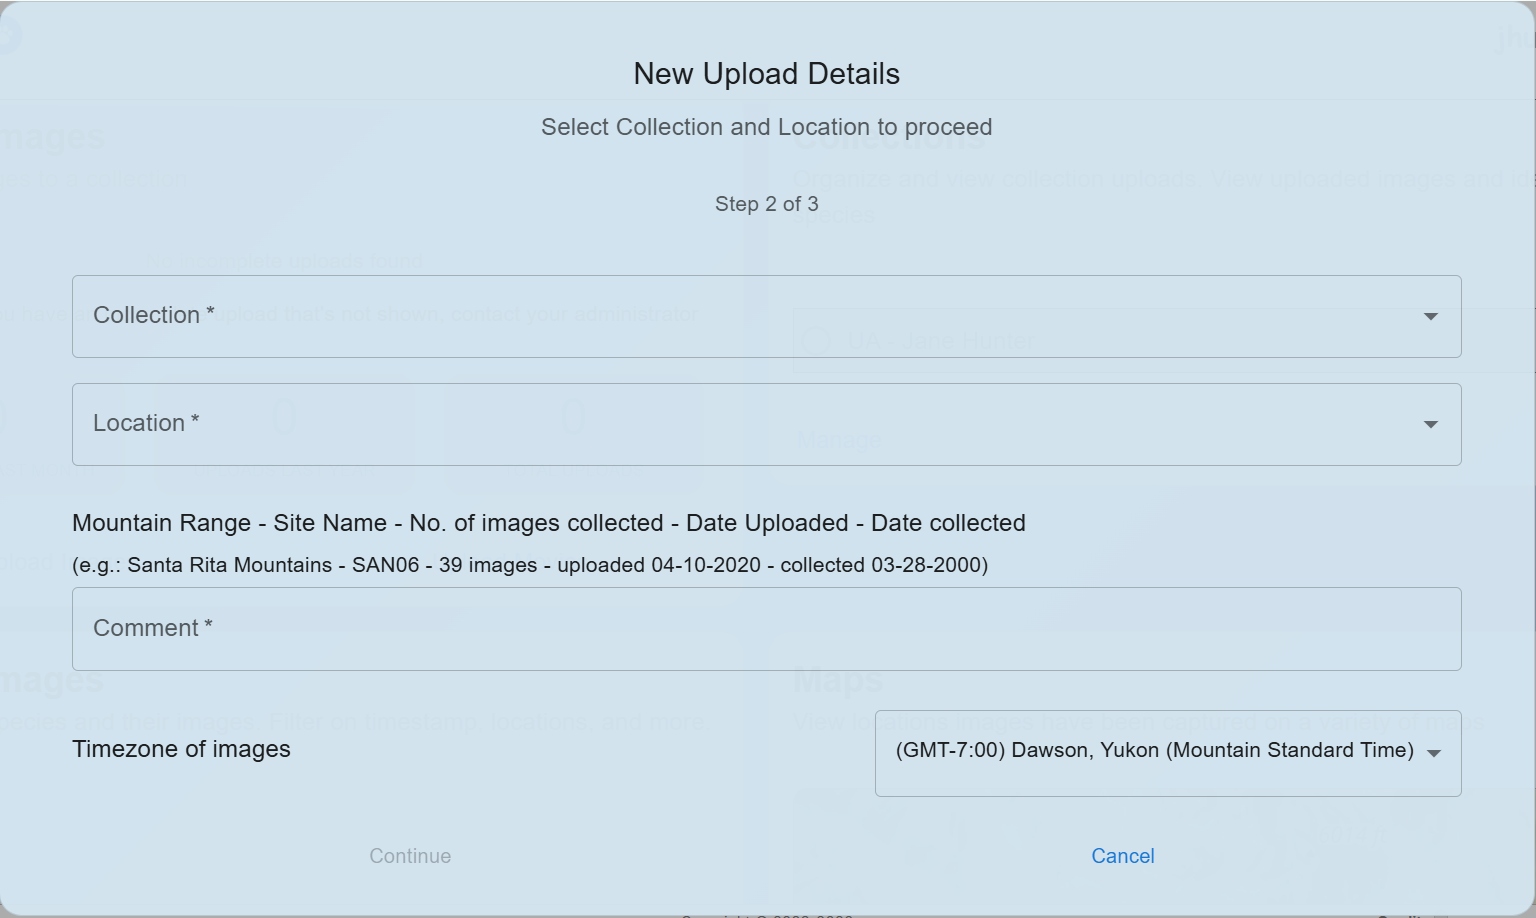
Click Continue. You will see an Upload complete message when finished.
Congratulations!
You have completed the training to upload images on the web-based SPARC’d application.